
A thorough pre trip inspection for truck drivers is far more than a simple compliance chore, it is a proactive strategy for safety, career protection, and operational efficiency. In the demanding world of commercial transportation, catching a defect before you leave the yard can mean the difference between a smooth run and a costly roadside breakdown. Fleetworthy understands that a well-executed inspection routine is the foundation of a proactive safety culture, moving beyond merely checking boxes to actively managing risk.
This comprehensive guide will walk you through the essential steps of a pre-trip inspection, clarify Federal Motor Carrier Safety Administration regulations, and provide actionable tips for Daily Vehicle Inspection Reports. By standardizing your walkaround and documentation processes, you can protect your Compliance, Safety, Accountability scores, maximize your uptime, and ensure that every journey begins on a secure footing.
Why Do Pre-Trip Inspections Matter for Truck Drivers and Fleet Operations?
The stakes involved in a pre trip inspection for truck drivers extend far beyond avoiding a fine. A disciplined inspection routine directly impacts safety, liability, and career longevity. When you identify and address mechanical issues before hitting the highway, you significantly reduce the risk of crashes and catastrophic failures.
Consider the difference between a caught defect and a missed one. A driver who notices a worn brake hose during a pre-trip inspection might delay their departure by an hour while maintenance replaces the part. In contrast, a driver who skips that check and experiences a brake failure on a steep grade faces severe safety risks, potential liability, and significant downtime. Fleetworthy’s safety and compliance solutions emphasize that catching these issues early is the most effective way to protect both the driver and the public.
How Does a Thorough Pre-Trip Inspection Improve Uptime and Control Costs?
Disciplined inspections reduce roadside breakdowns, violations, and the risk of crashes. This proactive approach has a direct, positive impact on CSA scores and operational costs. According to recent data from the Commercial Vehicle Safety Alliance International Roadcheck, nearly 20% of inspected vehicles were placed out of service. A staggering 90% of roadside violations are detectable during a standard pre-trip inspection.
By identifying maintenance needs early, fleets can plan repairs efficiently rather than paying premium rates for emergency roadside assistance. This prevents preventable downtime and ensures that loads remain on schedule. Fleetworthy’s DVIR Record Management tools help streamline this process, ensuring that identified defects are communicated to maintenance teams promptly and tracked until resolved.
|
Impact Area |
Reactive Approach (Skipping Inspections) | Proactive Approach (Thorough Inspections) |
|---|---|---|
| Safety Risk | High probability of on-road failure | Significantly reduced risk of mechanical failure |
| Maintenance Costs | Expensive emergency roadside repairs | Scheduled, cost-effective maintenance |
| Uptime | Unpredictable delays and out-of-service orders | Consistent schedules and reliable delivery times |
| CSA Scores | Negative impact from roadside violations | Protected scores through compliance |
What Are the FMCSA Regulations for Pre-Trip and Post-Trip Inspections?
Understanding the minimum legal requirements is essential, but professional operators strive for a higher standard. The FMCSA Part 396 framework mandates that a driver must be satisfied that the motor vehicle is in safe operating condition before driving. Additionally, drivers must review the last driver vehicle inspection report if defects were noted.
While the law sets the baseline, the professional standard involves a meticulous, repeatable process. It means not just looking at components, but actively verifying their condition. Fleetworthy advocates for going “Beyond Compliant,” transforming the mandatory inspection into a comprehensive health check of the vehicle.
How Do Roadside Inspectors Interpret “Properly Working” During an Audit?
Roadside inspectors rely on the CVSA North American Standard Out-of-Service Criteria to determine if a vehicle is safe to operate. “Properly working” is not subjective; it is defined by specific tolerances. For example, brake pushrod travel has strict limits, and tire tread depth must meet minimum federal standards (4/32 of an inch for steer tires, 2/32 for others).
During the 2025 CVSA Roadcheck, the top vehicle out-of-service violations were related to brake systems (24.4%) and tires (21.4%). Inspectors will check these critical areas rigorously. Fleetworthy’s compliance solutions help drivers and fleets stay ahead of these audits by ensuring that all components meet or exceed these rigorous standards before the vehicle ever reaches an inspection station.
What Is the Standard Step-by-Step Pre-Trip Walkaround Sequence?
A logical, repeatable sequence is the key to an efficient pre-trip inspection. By following the same path every time, drivers build muscle memory and are less likely to miss critical components. A comprehensive inspection can typically be completed in 10 to 15 minutes when executed systematically.
The 10-Step Mini-Checklist for Pre-Trip Inspections:
- Approach the Vehicle: Look for leaks, leaning, and overall posture.
- Under the Hood: Check fluid levels, belts, hoses, and the steering mechanism.
- Engine Start and In-Cab: Verify gauges, build air pressure, check mirrors, windshield, and emergency equipment.
- Front of Vehicle: Inspect headlights, turn signals, clearance lights, and steering axle tires.
- Driver Side: Check fuel tanks, battery box, exhaust system, and side markers.
- Coupling Area: Inspect air lines, electrical lines, fifth wheel, kingpin, and locking jaws.
- Rear of Tractor: Check drive axle tires, suspension, brakes, and tail lights.
- Trailer Side and Undercarriage: Inspect landing gear, frame, cross members, and tandem sliding rails.
- Rear of Trailer: Verify all lights, reflectors, mud flaps, and doors.
- Air Brake Test: Perform the applied leakage test, low air warning alarm, and spring brake pop-out test.
What Specific Checks Are Required for In-Cab, Under-Hood, and Exterior Components?
Each section of the vehicle requires specific attention.
In-Cab and Startup Checks: Ensure all gauges (oil pressure, coolant temperature, voltmeter) are functioning correctly. Verify that the heater, defroster, and windshield wipers operate smoothly. Check the condition of the seat belt and ensure all required emergency equipment (fire extinguisher, spare fuses, warning triangles) is present and secured.
Under-Hood and Fluids: Check the engine oil, coolant, and power steering fluid levels. Inspect all belts for proper tension and signs of wear. Examine hoses for leaks, cracks, or abrasions. Verify that the steering box and linkage are secure and free of leaks.
Tires, Wheels, and Suspension: Tires must have adequate tread depth and be free of cuts or bulges. Check wheel rims for cracks or bends, and ensure all lug nuts are present and tight (look for rust trails which indicate looseness). Inspect the suspension system, including leaf springs, U-bolts, and shock absorbers, for damage or missing parts.
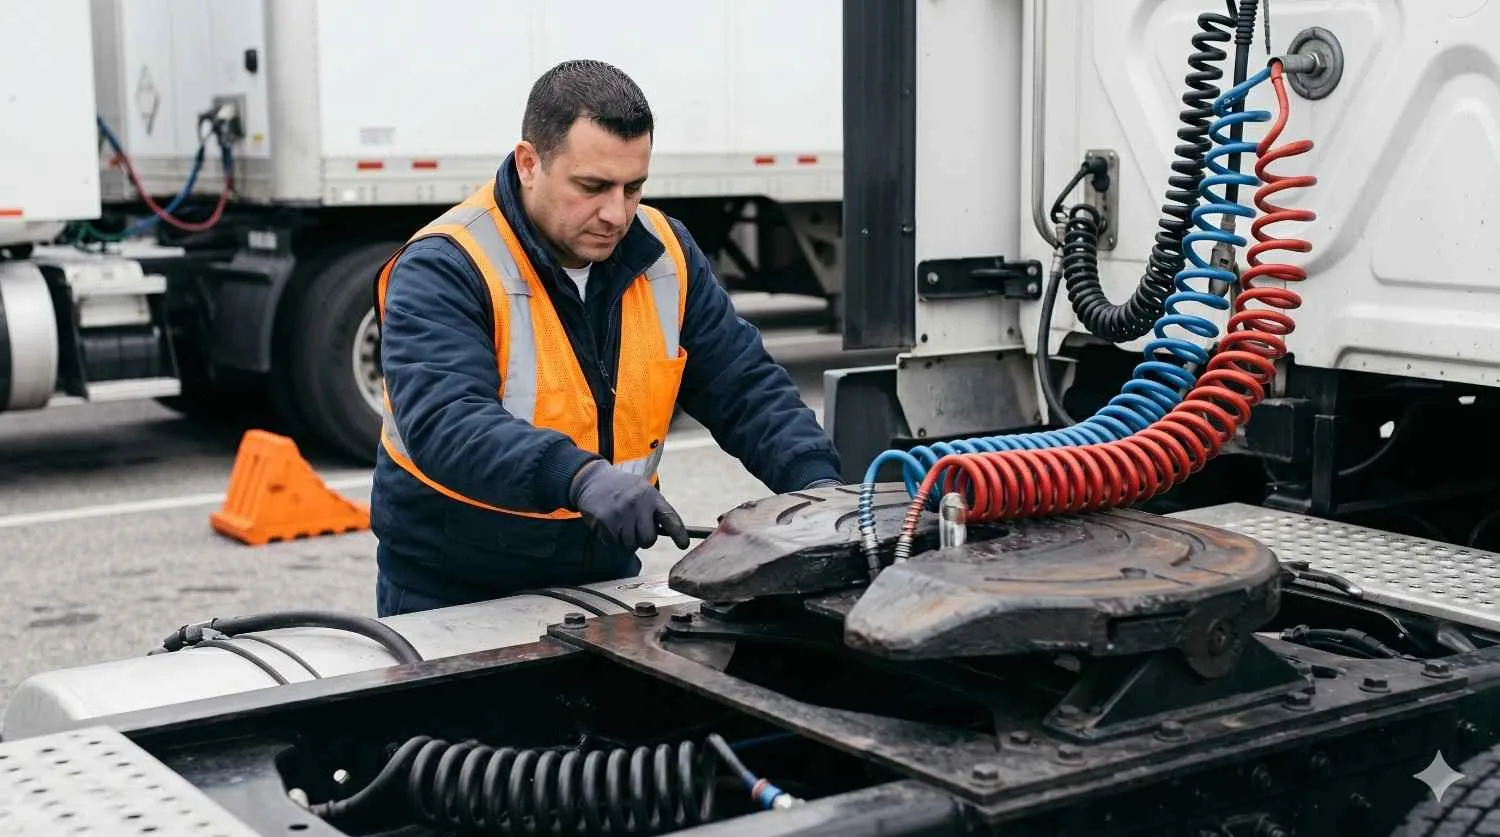
Coupling and Fifth Wheel: The connection between the tractor and trailer is critical. Verify that the air and electrical lines are secure and not chafing. Ensure the fifth wheel skid plate is properly lubricated and securely mounted. The locking jaws must be fully closed around the kingpin.
Air Brake System and Leak Test: The air brake test is a mandatory and critical component. It involves verifying that the air compressor builds pressure within the required timeframe, checking for air leaks with the brakes applied (loss of no more than 4 psi per minute for a combination vehicle), and ensuring the low air warning devices and spring brakes activate correctly.
How Does the Post-Trip Inspection and DVIR Close the Maintenance Loop?
The post-trip inspection focuses on identifying any issues that arose during the shift. The Daily Vehicle Inspection Report is the formal documentation of this process. According to 49 CFR 396.11, drivers must report any defect or deficiency that would affect the safe operation of the vehicle or result in a mechanical breakdown.
An out-of-service condition is triggered when a defect meets the criteria outlined in the CVSA guidelines, such as a significant air leak, a flat tire, or a malfunctioning steering component. Fleetworthy’s DVIR Record Management system ensures that these reports are captured, managed, and retained accurately, supporting DOT compliance and audit readiness.
How Do You Ensure Repairs Are Documented and Verified Before the Next Dispatch?
A DVIR is only effective if it drives action. If a defect is noted, the motor carrier must repair it and certify on the original DVIR that the repair was made (or that repair was unnecessary) before the vehicle is dispatched again. The next driver must review and sign the report to acknowledge the vehicle’s condition.
The problem many fleets face is a disconnect between the DVIR process and the maintenance workflow. Fleetworthy bridges this gap by centralizing records and tracking compliance. When adding photos, timestamps, and part numbers to enrich documentation, you provide maintenance teams with the precise information they need to resolve the issue quickly, without slowing down the next shift.
What Are the Best Time-Smart Routines for Thorough Inspections?
Efficiency in inspections comes from standardization. By walking the same path every time, the process becomes second nature. Group related checks together; for example, check all lights on a specific side of the vehicle while inspecting the tires and suspension in that area.
Having the right tools staged and ready also saves time. Keep gloves, a high-quality flashlight, a tire pressure gauge, wheel chocks, a lens cloth, and reflective gear easily accessible.
How Should Inspection Routines Be Adjusted for Weather and Night Conditions?
Adverse conditions require adjustments to the standard routine. During rain or snow, focus extra attention on windshield wipers, defrosters, and tire traction. In cold weather, ensure the air tanks are drained frequently to prevent moisture from freezing in the brake lines.
Night inspections demand a powerful flashlight. Use the light not just to see, but to create shadows that highlight loose fasteners, cracks, or leaks that might be missed in flat lighting. Reflective tape and lights must be meticulously cleaned and verified for visibility.
What Are the Most Common Pre-Trip Pitfalls and Missed Items?
Which Vehicle Components Are the Frequent Offenders During Roadside Inspections?
Despite the best intentions, certain items are consistently missed during pre-trip inspections, leading to roadside violations.
The Frequent Offenders:
- Brake Systems: Brake hoses, chambers, and slack adjusters are often overlooked. Inspectors frequently find chafing hoses or brakes out of adjustment.
- Tires and Wheels: Underinflated tires, embedded debris, and loose lug nuts are common issues.
- Lights and Reflectors: Non-functioning clearance lights, dirty reflectors, and damaged wiring are easy targets for inspectors.
- Coupling Devices: Incomplete locking of the fifth wheel jaws around the kingpin or damaged platform components.
How Can Drivers Use Quick-Check Heuristics to Catch Defects Easily?
Develop quick-check habits to make defects obvious.
- Sightlines: Look down the side of the trailer to spot leaning, which indicates suspension or tire issues.
- Sound Cues: Listen closely for the hiss of air leaks during the walkaround.
- Touch Tests: Run a gloved hand over belts to check for tension and feel the inner sidewalls of tires for hidden bulges.
| Component | Common Defect | Quick-Check Method |
|---|---|---|
| Brake Hoses | Chafing or wear | Visual inspection for rubbing against metal parts |
| Lug Nuts | Looseness | Look for rust trails or shiny threads |
| Tires | Underinflation | Use a calibrated tire pressure gauge (don’t just kick them) |
| Fifth Wheel | Improper locking | Visually verify jaws are completely closed around the kingpin |
How Do Proper Documentation Habits Protect the Driver and Carrier?
Clear, defensible documentation is your best protection against liability. When recording a defect, use neutral, factual wording. Include timestamps and, whenever possible, take clear photos of the issue.
For example, instead of writing “brakes bad,” write “driver side drive axle brake hose chafing against frame, outer rubber worn.” This precision leaves no room for misinterpretation and provides maintenance with exactly what they need to fix the problem.
Why Is Communicating Findings with Dispatch and Maintenance Critical?
Effective communication ensures that defects are addressed before they become emergencies. Explain the severity of the defect clearly. A minor issue might allow the trip to continue with a scheduled repair later, while a major defect requires immediate attention.
Fleetworthy’s platform facilitates this communication, ensuring that repair confirmations are documented and verified. This protects the driver from blame if an incident occurs later, proving that they fulfilled their responsibility to report the issue.

How Do You Adjust the Inspection for Advanced Scenarios and Special Loads?
Real-world complexity requires adjustments to the standard pre-trip inspection. When picking up a rented or unknown trailer, or during a drop-and-hook turnaround, you cannot rely on previous maintenance knowledge.
You must verify the trailer ID against your paperwork. Pay special attention to the landing gear, ensuring it operates smoothly and is fully retracted. Inspect the trailer’s structural integrity, including the roof and cross members, which may have been damaged by previous users.
What Are the Considerations for Temperature-Controlled, Hazmat, and Oversize Loads?
Specialized loads demand specialized checks.
- Reefer Trailers: Verify the pre-cool temperature, check the reefer fuel level, and inspect the unit’s belts and hoses.
- Hazmat Loads: Ensure all required placards are present, correct, and securely attached. Verify that the shipping papers are easily accessible in the cab.
- Oversize Loads: Inspect all specialized securement hardware, flags, and wide-load signs. Verify that the load dimensions match the permits.
Conclusion
A consistent pre trip inspection for truck drivers is a powerful tool for taking control of your safety, schedule reliability, and professional reputation. By shifting your mindset from merely checking boxes to actively managing risk, you protect your CSA scores and ensure maximum uptime. A practiced, well-documented routine is your best defense and your daily insurance policy. Fleetworthy encourages all drivers to commit to one repeatable flow, refine it regularly, and leverage technology to keep every fleet road-ready.
Frequently Asked Questions (FAQs): Pre-Trip Inspection for Truck Drivers
How long should a pre-trip inspection take for a CDL driver?
A thorough, standard pre-trip inspection should take a CDL driver between 10 to 15 minutes to complete, assuming a practiced routine. It may take longer in adverse weather conditions or when inspecting specialized equipment.
What is the difference between pre-trip and post-trip inspections?
A pre-trip inspection is conducted before driving to ensure the vehicle is safe to operate and meets all FMCSA regulations. A post-trip inspection is conducted at the end of the driving day to identify and document any defects that occurred during the shift on a DVIR, ensuring repairs are made before the next dispatch.
What must be included in a DVIR, and when is it required?
A Daily Vehicle Inspection Report must include the vehicle identity, a list of any defects or deficiencies that affect safe operation, and the driver’s signature. It is required at the completion of each day’s work on each vehicle operated, though FMCSA rules no longer require a DVIR for property-carrying vehicles if no defects are found.
Can I be placed out of service for a defective item found during pre-trip?
If you find a critical defect during a pre-trip inspection, the vehicle should not be driven until it is repaired. If a roadside inspector finds a defect that meets the CVSA Out-of-Service Criteria (such as severe brake issues or flat tires), you will be placed out of service until the repair is completed.
What do roadside inspectors tend to check first?
Roadside inspectors frequently focus first on the most common areas for critical violations: brake systems, tires, lights, and cargo securement. They will also thoroughly review the driver’s Hours of Service logs and credentials.
How often should air brake leak tests be performed and what are the limits?
An air brake leak test should be performed daily as part of the pre-trip inspection. The limits are a maximum pressure loss of 3 psi per minute for a single vehicle and 4 psi per minute for a combination vehicle, after the initial pressure drop when the brakes are applied.